Week 3 practical
Simple key- and button-press responses
The plan for week 3 practical
This week we are going to look at a little bit more of the Online Experiments with jsPsych tutorial, and then look at code for a simple grammaticality judgment experiment. Remember, the idea is that you do as much of this as you can on your own (might be none of it, might be all of it) and then come to the practical drop-in sessions or use the discussion board to get help with stuff you need help with.
Tutorial content
Work through the rest of section 04 of the Online Experiments with jsPsych tutorial. It’s up to you whether you want to do the exercises at the end of section 04 or not. The key things you need to take away from the tutorial are:
- How to displaying results on-screen at the end of the experiment.
- The basic info on key codes for keyboard-response trials.
- The general gist of timeline variables - we won’t be doing anything with factorial designs, but we will do a very simple kind of timeline variable in the more advanced version of today’s code, and we might need timeline variables later in the course too.
Jumping back into this practical at section 04 can be a bit confusing if you haven’t touched it for a week, so to help you out: once you have completed sections 01-03 and the “Putting the code in its own file” section of section 04 (which was the last thing last week), you should have a directory called hello that contains 4 things: an experiment.html file, an experiment.js file, an image called nasa_proxima.png, and a jspsch-6.1.0 folder containing all the jsPsych library stuff (that you downloaded as a bundle - you can just copy that entire folder into your hello folder). Download links for the html, js and image files are below - if you download those and arrange as described, then you can jump into section 04 of the tutorial at the “Adding more images” header and start adding things to the experiment.js file (e.g. a second image trial, the on_finish stuff, etc).
Here are the three files you need to do that:
Remember that the path on lines 5, 6 and 7 of experiment.html needs to have the correct name for the jsPsych folder - e.g. if the folder is called jspsych.6.1.0 then those lines have to point to the correct folder name.
A grammaticality judgment experiment
After you have looked at section 04 of the tutorial you should know just enough to make sense of a very simple grammaticality judgment experiment. I’d like you to download and run the code I provide, look at how the code works, and then attempt the exercises below, which involve editing the code in simple ways.
You need two files for this experiment, which you can download through the following two links:
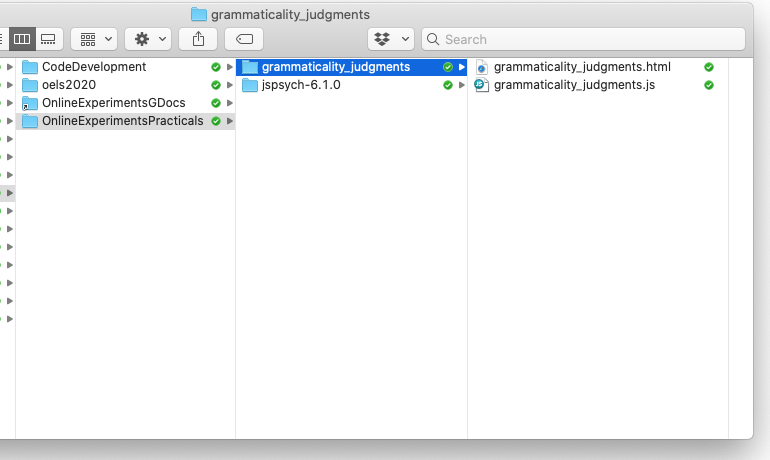
The code makes some assumptions about where you will save it - you can change that if you want but then you’ll have to edit the code so it is looking in the right place, so it might be simpler to copy my directory structure. Create a directory (or folder if you prefer that name) called e.g. OnlineExperimentsPracticals. Copy the jsPsych code you downloaded (for me that folder is called jspsych-6.1.0) into your OnlineExperimentsPracticals folder. Then create a new folder inside the OnlineExperimentsPracticals folder called grammaticality_judgments, copy the two files you just downloaded in there. So if you do that all correctly you will have a folder called OnlineExperimentsPracticals that has two sub-folders, the jspsych source code and then the grammaticality judgments code. On my mac it looks like this.
The idea is that every week will will add a new subfolder to the OnlineExperimentsPracticals folder containing new code for a new experiment, all accessing one shared copy of the jspsych source code.
Assuming you have the directory structure all right, this code should run on your local computer (just open the grammaticality_judgments.html file in your browser) or you can upload it to the teaching server and play with it there, using the same sort of directory structure.
First, get the code and run through it so you can check it runs, and you can see what it does. Then take a look at the HTML and js files in your code editor (e.g. Atom).
You will see that grammaticality_judgments.html doesn’t have much in it - all that does is use the <script>...</script> tag to load a couple of plugins plus the file grammaticality_judgments.js.
The bulk of the code is in grammaticality_judgments.js. You will see that that code includes comments - these are bits of text that are enclosed in special markers so that the machine running the code ignores them. They are intended for you to read, to explain what the code is doing. But I’ll also add some explanation here.
grammaticality_judgments.js is probably one of the simplest types of experiments you could build. It has 4 grammaticality judgment trials, where participants provide a keypress response: y or n for “yes, this sentence could be spoken by a native speaker of English” or “no, it could not”. Note that is slightly different from what Sprouse (2011) does - he asks people for a numerical response rather than a simple yes-no, we’ll come to that later.
There is also a little bit of wrapper around those 4 trials - a consent screen where participants click a button to give consent and proceed to the experiment,] some information screens before the experiment proper starts, and then a final screen where you can display debrief information, completion codes etc to participants.
The code starts by laying out the grammaticality judgment trials (NB just because they come first in the javascript file doesn’t mean they will be the first thing the participant sees - the timeline controls what participants see when). Each judgment trial involves showing the participant a sentence and getting a single keypress response from them, which we can achieve using the html-keyboard-response plugin. Details of the options for that plugin are in the jsPsych documentation. We are using the stimulus parameter to hold the sentence the participant is judging, prompt reminds the participant what they are supposed to be doing, and choices shows the list of keyboard responses they are allowed to provide - in this case we only accept y or n keypresses, so everything else is ignored. So the code for one judgment trial looks like this:
var judgment_trial_1 = {
    type: 'html-keyboard-response',
    stimulus: "Where did Blake buy the hat?",
    prompt: "<p><em>Could this sentence be spoken by a native speaker of English? Press y or n</em></p>",
    choices: ['y','n']
}
The only slightly fancy thing in there is that in the prompt I am using some HTML tags - the <p>...</p> tag to put the prompt in its own paragraph (it seperates the prompt from the stimulus a bit, which I think looks better) and also the <em>...</em> tag to make the prompt in italics (again, to visually separate it from the stimulus sentence).
The code defines 4 such trials, inspired by the type of sentences used in Sprouse (2011).
That’s basically the only interesting part of the code! But we also need some preamble for the participants. Most experiments start with a consent screen, where participants read study information and then consent to participate. I include a placeholder for this consent screen using the button-response plugin - you see the consent information and then click a button to indicate that you consent. The code for that looks as follows:
var consent_screen = {
  type: 'html-button-response',
  stimulus: "<h3>Welcome to the experiment</h3>\
  <p style='text-align:left'>Experiments begin with an information sheet that explains to the participant\
  what they will be doing, how their data will be used, and how they will be\
  remunerated.</p>\
  <p style='text-align:left'>This is a placeholder for that information, which is normally reviewed\
  as part of the ethical review process.</p>",
  choices: ['Yes, I consent to participate'],
}
You will notice that the stimulus parameter here is quite complicated - it includes some HTML markup, including tags for headers (<h3> and </h3> to start and end a header), and paragraphs (<p> … </p>). By default, jsPsych centres all text, which sometimes looks fine (e.g. for the judgment trials, where we want the stimulus to be centred) but it looks horrendous for instruction text, so I also tell it to left-align that text, by adding some stuff inside the paragraph tags - I start a left-aligned paragraph with <p style='text-align:left'>, then end it with </p> as usual. Finally, the choices parameter for this trial type is a list of button labels - lists are enclosed in square brackets, here the list contains exactly one option with the “yes I consent” text, which produces a screen with exactly one button to be clicked. Finally, I have to use a backslash (\) character whenever I want to include a line break in the stimulus string, otherwise javascript thinks there is a syntax error.
I also define some information screens - these are html-keyboard-response trials, just like the judgment trials, but since I haven’t specified a restricted range of valid responses in the choices parameter, any key press will move the participant to the next trial. So for example the first instruction screen looks like this:
var instruction_screen_1 = {
  type: 'html-keyboard-response',
  stimulus: "<h3>Instructions</h3> \
  <p style='text-align:left'>In this experiment you will read English sentences, and determine if they sound\
  grammatical to you. By grammatical, we mean whether you think a native speaker of\
  English could say this sentence in a conversation. In other words, do you think it\
  would sound odd for your friends to say this to you, as if they don't speak English natively?</p>\
  <p style='text-align:left'>We are <b>not</b> concerned with whether the sentence would be graded highly\
  by a writing teacher: we do not care about points of style or clarity, and we do\
  not care about the grammar rules that you learned in school (who versus whom,\
  ending a sentence with a preposition, etc). Instead, we are interested in whether\
  these sentences could be said by a native speaker of English in normal daily speech.</p>\
  <p>Press any key for more instructions.</p>"
}
That’s quite a lot of text, but it’s just a very simple keyboard response trial with a long bit of HTML-formatted bit of text to display.
Once all the various trials are defined, we can stick them together in a timeline for the experiment. The timeline is very simple and is just a list of all the trials we have created up to this point:
var full_timeline = [consent_screen,instruction_screen_1,instruction_screen_2,
                    judgment_trial_1,judgment_trial_2,judgment_trial_3,judgment_trial_4,
                    final_screen]
Then to run the experiment we call jsPsych.init with this full_timeline variable we have created. We also tell it to show the raw data on-screen at the end of the experiment (using the on_finish parameter of jsPsych.init). Obviously in a real experiment you would save the data rather than just showing it back to the participant, we’ll show you how to do that later in the course!
jsPsych.init({
    timeline: full_timeline,
    on_finish: function(){jsPsych.data.displayData('csv')}
})
Exercises with the grammaticality judgment experiment code
Attempt these problems.
- How would you add extra judgment trials to this code, to ask people about the grammaticality of some additional sentences? Try adding a few new judgment trials.
- Have a look at the data that is displayed at the end of the experiment. Can you see where the stimulus and the response for each trial is recorded? Is there anything in the data you weren’t expecting or don’t understand?
- Can you change the judgment trials so participants can provide a single-digit numerical response, e.g. any number between 1 and 9, rather than simply allowing y or n as valid responses? That numerical response could indicate a more continuous scale of grammaticality, a bit more like Sprouse’s magnitude estimation task.
- Can you change the judgment trials so the participants provide their responses by clicking yes/no buttons, rather than using the keyboard? (Hint: look at how I did the button on the consent screen)
- How would you use buttons to provide a wider range of responses (e.g. “completely fine”, “a little strange”, “very strange”, …)?
- [More challenging] Sprouse (2011) actually uses a rather different layout and type of response: he has participants enter a numerical value for each sentence, has multiple judgments presented on a single page, and provides a reference sentence (e.g. an example sentence which should receive a score of 100) at the top of each page. Can you replace our simple yes/no judgment trials with something more like what Sprouse did, using the jsPsych survey-text plugin?
Optional: a version of the code using timeline variables
You might have noticed that in grammaticality_judgments.js we quite laboriously lay out 4 judgment trials, all of which are identical in structure apart from the stimulus parameter. There are a couple of more efficient ways to do this, one of which is by using jsPsych timeline variables. If you’d like to see how that’s done, download and inspect the file grammaticality_judgments_with_timeline_variables.js, stick it in your grammaticality_judgments folder, then see if you can get that to run by telling grammaticality_judgments.html to load the timeline javascript file rather than the basic one.
You might be wondering what the advantage of using fancier code is, and/or thinking “I could just copy and paste the judgment trials and edit them directly, isn’t that simpler?”. It maybe is conceptually simpler to copy and paste simple code, but it’s also more error prone, since it relies on you not making any mistakes in copying, pasting and editing the same little block of code over and over. In general, if you find yourself doing a lot of copying, pasting and editing when writing code it’s a sign that you are doing manually something that the computer could do for you automatically, more quickly and with less chance of errors. We’ll come back to that next week when we look at self-paced reading, where the “simple” manual approach would produce some really unwieldy code.
Re-use
All aspects of this work are licensed under a Creative Commons Attribution 4.0 International License.