Week 7 practical
Audio, trial data again, preloading stimuli, saving data to the server trial by trial
The plan for week 7 practical
This week we are going to look at code for a perceptual learning experiment based on the experiment described in Levi-Ari (2017) (and in fact using her stims, see below). There’s no new material to look at in the Online Experiments with jsPsych tutorial. The perceptual learning experiment uses the audio-button-response plugin to play audio and get button-click responses, we haven’t used it before but it works in basically the same way as other button-response plugins you have used. We are also going to reuse some code from the word learning experiment to handle randomisation of button positions and using data to keep track of which buttons appeared where. The main new things we’ll introduce are the audio (but jsPsych makes that very easy), buttons which are images rather than text (which you might have wondered about when thinking about a marbles-based version of last week’s experiment), preloading stimuli, and also saving data trial-by-trial to the server rather than waiting till the end and dumping it all in one go.
Remember, as usual the idea is that you can work through these practicals in the lab classes and, if necessary, in your own time - I recommend you use the lab classes as dedicated time to focus on the practicals, with on-tap support from the teaching team.
Acknowledgments
Dr. Shiri Lev-Ari (who is obviously the author of Lev-Ari, 2017) very kindly shared the audio stimuli for her experiment and gave me permission to make them public here, so the code uses the same audio files as the real experiment. Shiri wasn’t able to share the visual stims since she didn’t have sharing permission for all of them, but my research assistant Rachel Kindellan did some epic google image searching and found equivalent images which are licensed to be shared - so the images are not identical to the ones used by Shiri, but should be close enough to give you a feel for the experiment.
A perceptual learning experiment
Getting started
As usual, I’d like you to download and run the code I provide, look at how the code works, and then attempt the exercises below, which involve editing the code in simple ways.
You need a bunch of files for this experiment - as per last week, an html file, a js file, a php file (for saving data), and then several folders containing images and sound files. Again, rather than downloading them individually, download the following zip file and then uncompress it into your usual practicals folder:
I have also included a copy of jsPsych in the zip, so this zip file includes everything you need for this experiment. Extract these files to a folder called something like perceptual_learning, alongside your grammaticality_judgments, self_paced_reading and word_learning folders.
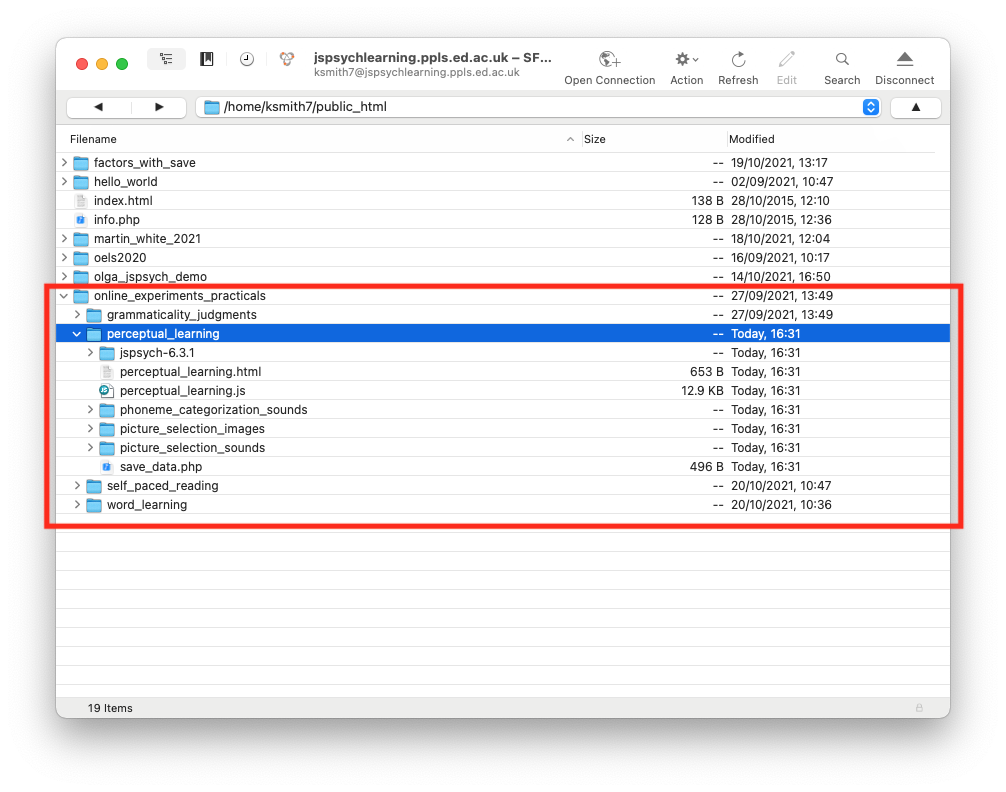
This code should run on your local computer just by opening the html file in the usual way, but as per last week it won’t save any data for you unless you are running it on the jspsychlearning server, so I suggest uploading it there - upload the whole perceptual_learning folder to your public_html folder on the jspsychlearning server and play with it there (if your directory structure is as I have been using so far, where all the exercises are in a folder called online_experiments_practicals, then the url for your experiment will be http://jspsychlearning.ppls.ed.ac.uk/~UUN/online_experiments_practicals/perceptual_learning/perceptual_learning.html where UUN is your UUN, see below for a screenshot of my public_html folder with the relevant bit highlighted).
First, get the code and run through it so you can check it runs, and you can see what it does. Also check it saves data for you in your server_data folder (if that file isn’t there, try clicking the “Refresh” button in cyberduck to refresh the file list). Then take a look at the html and js files in your code editor (e.g. Visual Studio Code), and read on.
Structure of the experiment
The experiment consists of three stages:
- A questionnaire on social networks.
- A block of picture selection trials, where in each trial participants hear a description (e.g. “the fresh dill”, “the orange telephone”) and click on one of two images (e.g. pictures of fresh or dry dill, pictures of an orange or black telephone). The purpose of this block is to expose participants to exemplars of /d/ and /t/ being produced by a (female) speaker; in the manipulated-/d/ condition participants encounter instances of /d/ (e.g. in “dill”) which have an unusually long VOT (i.e. are somewhat /t/-like), conversely in the manipulated-/t/ condition participants encounter instances of /t/ (e.g. in “the orange telephone”) which have unusually short VOT (i.e. are somewhat /d/-like).
- A block of phoneme categorization trials, where in each trial participants hear a voice (in the same speaker condition, the female speaker again; in the new speaker condition, a new male speaker) say a single word and then decide if that word is “dean” or “teen” (i.e. whether it started with a /d/ or a /t/); the word-initial consonants vary in VOT, so these trials allow us to assess whether the participants’ perceptual boundary for /d/-/t/ has been shifted.
Social network questionnaire
The full set of questions is available in the supporting information of Lev-Ari (2017). As you can see, there are various text-box questions which are easy enough to implement in jsPsych using the survey-html-form plugin (look again at the end of the week 4 practical). In the code I have only implemented the first three questions, which all require numeric answers:
var social_network_questionnaire = {
  type: "survey-html-form",
  preamble:
    "<p style='text-align:left'> <b>Social network questionnaire</b></p>\
              <p style='text-align:left'> In this questionnaire we would like to \
              gather information about your linguistic interactions. We realize \
              that some of the estimates are difficult to make. Please do your \
              best and be as accurate as possible.</p> \
              <p style='text-align:left'> Important: When providing estimates for \
              your exposure in a week, keep in mind that your habits may vary \
              considerably depending on the day of the week (e.g., weekday vs. weekend). \
              Please be as accurate as possible and do not simply multiply your \
              estimate for one day by 7.</p>",
  html: "<p style='text-align:left'>How old are you? <br> \
              <input required name='age' type='number'></p> \
         <p style='text-align:left'>With how many people do you converse orally \
         in a typical week? (Please only include people with whom you regularly \
           talk for longer than 5 minutes)<br> \
              <input required name='n_speak_to' type='number'></p> \
           <p style='text-align:left'>How many hours do you usually spend on \
           conversing orally with people in a typical week?<br>\
              <input required name='hours_speak_to' type='number'></p>",
};
Picture selection trials
Remember that on each picture selection trial the participant hears a description (“the fresh dill” etc) and the clicks on one of two images. We can do this fairly straightforwardly using the audio-button-response plugin (here is the documentation): we specify a stimulus which is the audio file we want to play, and then we can make the buttons be images rather than text; you have seen button response trials several times already, but never with images on the buttons, so that involves something a bit new.
You will notice that the directory for this experiment contains folders called picture_selection_sounds and picture_selection_images. Those contains all the sound files and images we should need. My example code just uses a few of these, but you can look at a file called perceptual_learning_stims.csv, included in the zip file you downloaded, to see the full list of what images and sounds are available and how they fit together. The important things at this point are:
- For the critical trials (i.e. not filler trials), there are two versions of each sound file, called e.g.
fresh_dill.mp3andfresh_dill_man.mp3- themanon the end signifies that this is a manipulated sound file, in this case with the initial sound in “dill” replaced with the ambiguous 24ms VOT segment (it’s worth listening to the two files to see how subtle the difference is). We can control whether the participant hears a manipulated sound or a normal sound just by changing the name of the sound file we play. - The image files come in pairs (e.g.
fresh_dill.jpgis paired withdry_dill.jpg), and the ‘correct’ image should have the same name as its sound file (i.e.fresh_dill.mp3goes withfresh_dill.jpg).
So what we want to do on each picture selection trial is play the sound file and show two buttons with the pair of images. We’ll start off doing this without images and with text buttons instead, and gradually build up to the implementation that’s in the code.
Forgetting about images for a moment, we could build a simple selection task like this:
var dill_trial = {
  type: "audio-button-response",
  stimulus: "picture_selection_sounds/fresh_dill.mp3",
  choices: ["fresh_dill", "dry_dill"],
};
That would play the sound file picture_selection_sounds/fresh_dill.mp3 (note that we have to tell the code that this sound file can be found in the folder picture_selection_sounds), and give the participant two text-button options, “fresh_dill” and “dry_dill” (so no images yet). The order of those choices is fixed though - the correct response is on the left - and unless we want to manually randomise when constructing our trial list it might be wise to borrow some of the tricks from the word learning experiment and randomise the order of the buttons on every trial. As usual, the jsPsych plugin won’t record this for us, so we will have to use the data object again to keep track of what order the buttons are in and which one the participant clicked on. We can just borrow the code from the word learning experiment to do this:
var dill_trial = {type:'audio-button-response',
                  stimulus:"picture_selection_sounds/fresh_dill.mp3",
                  choices:["fresh_dill","dry_dill"]
                  on_start: function(trial) {
                      var shuffled_label_choices = jsPsych.randomization.shuffle(trial.choices)
                      trial.choices = shuffled_label_choices
                      trial.data = {button_choices:shuffled_label_choices}
                  },

                   //at the end, use data.response to figure out
                   //which label they selected, and add that to data
                   on_finish: function(data) {
                      var button_number = data.response
                      data.button_selected = data.button_choices[button_number]
                    }
                };
So we initially specify the default ordering of the choices as ["fresh_dill","dry_dill"], then in on_start we randomise that order, set choices to the new randomised order and then make a note in data of that randomised order, under the heading button_choices. Then in on_finish (i.e. after the participant has pressed a button) we use the response information recorded automatically to work out which choice the participant selected, and store that in data as button_selected. By this point you might be getting a bit puzzled about the various parameters of trial.data associated with the participant’s response, so to try to help you keep those straight:
data.responseis the button index recorded by the plugin - this will be 0 if they clicked the first (leftmost) button, 1 for the second button, etc)data.button_choicesis where we record our randomised trial choices. If we don’t record this somewhere we have no idea what actual choice (“fresh_dill” or “dry_dill”) response 0 or response 1 corresponds to.data.button_selectedis the choice corresponding to the button index the participant clicked (which we can work out by looking atdata.button_choicesanddata.response) - this is the most meaningful data field, since it’ll be either “fresh_dill” or “dry_dill” depending on which button the participant clicked.
At this point we are getting close to what we want - play a sound file, click on a button, with the button position randomised, and record what button is selected - but of course our buttons just have the text “fresh_dill” and “dry_dill” in them, and actually we want the images from the corresponding image files. One way to do that is to replace our simple text button choices with <img ...> tags, which tell the browser to show an image rather than some text. For instance, this would work:
var dill_trial = {type:'audio-button-response',
                  stimulus:"picture_selection_sounds/fresh_dill.mp3",
                  choices:["<img src=picture_selection_images/fresh_dill.jpg width=250px>",
                          "<img src=picture_selection_images/dry_dill.jpg width=250px>"]
                          ...
                  };
(with … meaning everything else the same as the earlier example). We use the img tag to make the browser include an image, and then use src to tell it where to get the image from (note that have to include the directory name, picture_selection_images/, and the image type, .jpg). We also tell it how big we want the image to be - in this case, telling it to display the image at 250 pixels width. Then everything else will work as before, the two buttons will be shuffled, and we’ll end up with clickable image buttons. The only downside is that this is quite redundant - for both buttons we specify exactly the same information about the file path, the width etc, which seems kind of inefficient and potentially error prone. Also, all that button formatting stuff will be saved in data (under data.button_choices and data.button_selected) and will eventually be added to our experiment data, which is a bit messy and will make our data hard to look at.
There is actually a way around this, which is to use the button_html parameter of the plugin, which allows us to specify how all the buttons should be shown. We can use this to specify that the choices should be used as part of the name for image files when building the buttons. Integrating this into the code (with … meaning everything else the same as the earlier example):
var dill_trial = {type:'audio-button-response',
                  stimulus:"picture_selection_sounds/fresh_dill.mp3",
                  choices:["fresh_dill","dry_dill"],
                  button_html: '<button class="jspsych-btn"> <img src="picture_selection_images/%choice%.jpg" width=250px></button>',
                  ...
                  };
What that extra bit of code in button_html does is set up a template for the buttons that the information in choices is slotted into (the marker %choice% tells the code where to drop in the information from choices, i.e. “fresh_dill” or “dry_dill”) - so it will use “fresh_dill” as (part of) the file name for one button, “dry_dill” for the other. Then I only specify all the button formatting once, and also in my data I am just going to end up recording the important varying information (the image name, rather than the full path and all the button format stuff), which makes my experiment data less awful to look at.
We are nearly done, but of course this is just the specification for one trial, and we are going to need to specify many trials - they will all have the same format and just differ in stimulus and choices, so I really don’t want to write them all out in long format when building my trial list. One way around this is to use a fairly simple nested timeline as we have done in previous weeks, where we make an audio-button-response trial that specifies the common properties of all these trials and give it a nested timeline with the information that varies per trial:
var selection_stim_list = [
  {
    stimulus: "picture_selection_sounds/fresh_dill.mp3",
    choices: ["fresh_dill", "dry_dill"],
  },
  {
    stimulus: "picture_selection_sounds/orange_telephone.mp3",
    choices: ["orange_telephone", "black_telephone"],
  },
  {
    stimulus: "picture_selection_sounds/angel_wing.mp3",
    choices: ["angel_wing", "airplane_wing"],
  },
  {
    stimulus: "picture_selection_sounds/animal_ear.mp3",
    choices: ["animal_ear", "animal_nose"],
  },
];

var selection_trials = {
  type: "audio-button-response",
  timeline: selection_stim_list,
  button_html:
    '<button class="jspsych-btn"> <img src="picture_selection_images/%choice%.jpg" width=250px></button>',
  on_start: function (trial) {
    var shuffled_label_choices = jsPsych.randomization.shuffle(trial.choices);
    trial.choices = shuffled_label_choices;
    trial.data = { button_choices: shuffled_label_choices };
  },
  on_finish: function (data) {
    var button_number = data.response;
    data.button_selected = data.button_choices[button_number];
  },
};
That is a bit better - I specify my selection_stim_list, which is just a list of stimulus and choices for my block of trials, then I use that as my embedded timeline. But I am still not quite satisfied, because laying out the selection_stim_list still looks a bit complicated - each object in that list is quite complicated, and it’s hard for me to look at that and see exactly what is going on. Remember that I am just going to give a slightly different sound file name for manipulated or non-manipulated sound files, and I will have to change all that in this list - making sure I have done it properly and have exactly the trials I want looks like it might be awkward. So instead I am going to write a little function that I can use to build selection_stim_list for me - I specify what I want the trial to look like at a high level (what is the sound file, is it the manipulated sound file or not, and what are the two buttons going to show?) and it will generate the correct stimulus and choices for me. Here’s my function:
function make_image_selection_stimulus(
  sound,
  manipulated,
  target_image,
  foil_image
) {
  if (manipulated) {
    //manipulated files have "_man" (for manipulated) stuck on the end of the file name
    var sound_file = "picture_selection_sounds/" + sound + "_man.mp3";
  } else {
    var sound_file = "picture_selection_sounds/" + sound + ".mp3";
  }
  var stim = { stimulus: sound_file, choices: [target_image, foil_image] };
  return stim;
}
My make_image_selection_stimulus function takes four arguments: sound, manipulated, target_image, and foil_image.
soundis the name of the sound file (minus all the path info etc - the code will add that for me)manipulatedis eithertrue(use the 24ms VOT version) orfalse(use the normal version)target_imageandfoil_imageare the names of the target and foil picture (again, minus any path info).
The function doesn’t do anything fancy, and mainly just bundles up the information we provide into the correct format to use as an embedded timeline - it builds the full sound file name for us, and based on the value of manipulated it will either include “_man” at the end of the file name or not (remember, files with “_man” on the end of the name are the manipulated audio versions).
Here is how I use it to build my selection_stim_list:
var selection_stim_list = [
  make_image_selection_stimulus(
    "fresh_dill",
    true,
    "fresh_dill",
    "dry_dill"
  ),
  make_image_selection_stimulus(
    "orange_telephone",
    false,
    "orange_telephone",
    "black_telephone"
  ),
  make_image_selection_stimulus(
    "angel_wing",
    false,
    "angel_wing",
    "airplane_wing"
  ),
  make_image_selection_stimulus(
    "animal_ear",
    false,
    "animal_ear",
    "animal_nose"
  ),
];
Now I feel much happier about my procedure for building my picture selection trial list. It’s nice and clear to me what the sound and images are going to be. And it’s nice and clear if it’s a manipulated-audio trial or not - in this case I have manipulated audio for the /d/ trial but not for the /t/ trial and not for the filler trials (NB: there are no manipulated audio files for the fillers, so if you try to set manipulated to true for those it will complain that it can’t find those audio files).
Now I have my selection_stim_list I can plug that into my picture selection trial as a nested timeline. I am also going to add 4 things to my picture selection trials, which I will explain once I show you the code.
var selection_stim_list_unshuffled = [
  make_image_selection_stimulus(
    "fresh_dill",
    true,
    "fresh_dill",
    "dry_dill"
  ),
  make_image_selection_stimulus(
    "orange_telephone",
    false,
    "orange_telephone",
    "black_telephone"
  ),
  make_image_selection_stimulus(
    "angel_wing",
    false,
    "angel_wing",
    "airplane_wing"
  ),
  make_image_selection_stimulus(
    "animal_ear",
    false,
    "animal_ear",
    "animal_nose"
  ),
];

var selection_stim_list = jsPsych.randomization.shuffle(
  selection_stim_list_unshuffled
);

var selection_trials = {
  type: "audio-button-response",
  timeline: selection_stim_list, //use selection_stim_list to get stimulus and choices per trial
  button_html:
    '<button class="jspsych-btn"> <img src="picture_selection_images/%choice%.jpg" width=250px></button>',
  post_trial_gap: 500, //a little pause between trials
  on_start: function (trial) {
    var shuffled_label_choices = jsPsych.randomization.shuffle(trial.choices);
    trial.choices = shuffled_label_choices;
    trial.data = {
      block: "image_selection",
      button_choices: shuffled_label_choices };
  },
  on_finish: function (data) {
    var button_number = data.response;
    data.button_selected = data.button_choices[button_number];
    save_perceptual_learning_data_line(data); //save the trial data
  },
};
This is the same trial structure as before (i.e the nested timeline, the button_html, the on_start and on_end functions), but with 4 additions:
- I am using
jsPsych.randomization.shuffleto shuffle the stimulus list, so my picture selection trials will play in random order. - I have added a
post_trial_gapof 500ms - this inserts a little 500ms-long blank space after each picture selection trial. I always worry about people just mashing the buttons through these experiments, or accidentally clicking through multiple trials at once - inserting a little pause makes this less likely, plus makes the whole experience a little less frenetic. - In the
on_start, as well as storing the randomised order of the buttons indata.button_choices, I am adding a tag to the data to indicate that this is the image selection part of the experiment, just as we did last week in the word learning experiment. - In the
on_finish, as well as the usual stuff, I am calling a function calledsave_perceptual_learning_data_line- you haven’t seen this function yet, it is defined below, but it is going to save the data for us after every trial. As I mentioned last week, this is a tiny bit more complicated than saving all the data at once at the end of the experiment, but it’s really worth the effort - in online experiments people often suffer technical problems mid-way (or claim to!) and saving the data trial-by-trial means you can actually see how far they got and pay them accordingly. If you just save the data at the end then if someone tells you they were doing the experiment and had a technical problem you have no way of verifying that, plus you lose all their data.
That’s it for the picture selection phase of this experiment, which is the most complex part.
Phoneme categorization trials
This will be relatively simple. Remember that in each phoneme categorization trial the participant hears a voice (either the same speaker as in the picture selection phase or a new male speaker) and indicates by button press if that word is “dean” or “teen” (i.e. whether it started with a /d/ or a /t/); we can do all this using the audio-button-response plugin. We can use essentially exactly the same approach as above, except that we always present the same two choices on each trial (dean vs teen), and don’t bother randomising the left-right order of those on-screen. Here’s the code:
var categorization_stim_list_unshuffled = [
  { stimulus: "phoneme_categorization_sounds/samespeaker_VOT5.mp3" },
  { stimulus: "phoneme_categorization_sounds/samespeaker_VOT10.mp3" },
  { stimulus: "phoneme_categorization_sounds/samespeaker_VOT15.mp3" },
  { stimulus: "phoneme_categorization_sounds/samespeaker_VOT20.mp3" },
  { stimulus: "phoneme_categorization_sounds/samespeaker_VOT25.mp3" },
  { stimulus: "phoneme_categorization_sounds/samespeaker_VOT30.mp3" },
  { stimulus: "phoneme_categorization_sounds/samespeaker_VOT50.mp3" },
  { stimulus: "phoneme_categorization_sounds/samespeaker_VOT80.mp3" },
];

var categorization_stim_list = jsPsych.randomization.shuffle(
  categorization_stim_list_unshuffled
);

var categorization_trials = {
  type: "audio-button-response",
  choices: ["dean", "teen"],
  post_trial_gap: 500,
  timeline: categorization_stim_list,
  on_start: function (trial) {
    trial.data = {
      block: "phoneme_categorization",
      button_choices: trial.choices,
    };
  },
  on_finish: function (data) {
    var button_number = data.response;
    data.button_selected = data.button_choices[button_number];
    save_perceptual_learning_data_line(data);
  },
};
A few things to note:
categorization_stim_list_unshuffledis our list of audio stimuli that we will use - I have set it up here as the same speaker condition, playing all the availablesamespeakeraudio files. I have to specify the path to these audio files, which are in thephoneme_categorization_soundsdirectory - I could have written a little wrapper function like I did in the picture selection test to add the path info, but here I don’t find the redundancy too bad.- We then shuffle
categorization_stim_list_unshuffledand use the resultingcategorization_stim_listas the nested timeline incategorization_trials. Everything else aboutcategorization_trialsis the same as the code we used above to create the picture selection trials, except that thechoicesare always the same, and I am not left-right randomising the order of the buttons. - As with the picture selection trials, in
on_startwe are recording the block and button choices in the trial data, and inon_finishwe are using thesave_perceptual_learning_data_line(data)to record the trial data - I’ll talk you through that function below.
Saving data trial by trial
The rest of the code sets up the timeline in the usual way (creating placeholders for the instruction screens, using concat to concatenate the various lists of trials, then jsPsych.init to run the timeline). The only interesting new thing is the function save_perceptual_learning_data_line which we call each time a critical trial (picture selection or phoneme categorization) finishes. We pass this function the trial’s data, and it digs out the data we want, uses join to stick together that list of data into a comma-separated string, and then uses the save_data function that we introduced last week to write that data to a file called perceptuallearning_data.csv. Since save_data appends to the end of the file, each new line of data will be added, rather than over-writing the previous contents of the file.
function save_perceptual_learning_data_line(data) {
  // choose the data we want to save - this will also determine the order of the columns
  var data_to_save = [
    data.block,
    data.trial_index,
    data.time_elapsed,
    data.stimulus,
    data.button_choices,
    data.button_selected,
    data.response,
    data.rt,
  ];
  // join these with commas and add a newline
  var line = data_to_save.join(",") + "\n";
  save_data("perceptuallearning_data.csv", line);
}
One shortcoming of this method is that our csv file won’t have column names, which is not ideal. I have therefore used another plugin, the call-function plugin, to write the column names to the csv file before the first data-generating trial. The call-function plugin allows us to run some code behind the scenes - it has no components that are visible to the participant (i.e. no stimulus, no response), but it takes a func parameter which accepts a function that will do some work for us. In this case I am going to use that to run the save_data function, to write a single line of data (just the column names) to our data file. The code to do this looks like this:
var write_headers = {
  type: "call-function",
  func: function () {
    //write column headers to perceptuallearning_data.csv
    save_data(
      "perceptuallearning_data.csv",
      "block,trial_index,time_elapsed,stimulus,button_choice_1,button_choice_2,button_selected,response,rt\n"
    );
  },
};
Notice that the thing I am writing to the data file (using the save_data function) is a single comma-separated string with a new line at the end, so it’s in the correct format to display properly in my csv data file. Then I’ll slot this write_headers trial near the start of the experiment timeline, just after the consent screen, so that the headers get written before any real data.
Preloading
Downloading stimuli (audio or images) over the internet takes time, and the amount of time it takes depends on the speed of your participants’ connection, which is a problem in an experiment where we care about presenting stimuli for a set amount of time or generally presenting an experiment without lots of random lags and delays while stimuli are loaded. To avoid this, jsPsych provides a way of preloading stimuli, using the preload plugin - you drop a preloading trial into your timeline at the point where you want to load the stimuli, and when the timeline reaches that point it loads the items marked for preloading into the participant’s browser, ensuring they’ll be instantly available later when you need them; while the stimuli are preloading the participant sees a little progress bar so they know that something is happening. The code for creating this preload trial is very simple and looks like this:
var preload = {
  type: "preload",
  auto_preload: true,
};
Then I slot this preload trial into my timeline just after the consent screen, to preload the stimuli at that point. You’ll notice that I have specified auto_preload: true in the preload trial. Each jsPsych plugin flags up some parameters for preloading - for instance in the audio-button-response plugin it’s the stimulus parameter that is marked up to be preloaded (similarly, in an image-button-response trial it’s the image stimulus that is marked for preloading). So by specifying auto_preload: true I am telling the preloading trial to go and find those stimuli that are flagged in this way and preload them - it’ll do that for us, so all our audio stimuli will be preloaded and should play seamlessly when we get to the audio trials.
You might notice that when you run through the experiment that the images in the buttons take a moment to load at the start of each trial - this will be particularly pronounced if you are on a slow network. Why is that happening if we have a preload trial in our timeline?? That’s because audio-button-response doesn’t know that it needs to look out for images buried among the trial choices - audio-button-response just marks the stimulus parameter for preloading, but it doesn’t automatically preload our button images, because they don’t appear in a place it expects to have to preload (and actually knowing that they are images would involve some fairly complicated inference looking at the button_html parameter, so it’s not surprising it doesn’t try). It is actually possible to tell jsPsych to preload extra stimuli, which you can do by adding a manual preload list of images or audio to the preload trial - check out the the documentation for the preload trial, and look in particular at the images parameter of the plugin and the example (near the bottom) titled “Manually preloading an image” to see how to add an images parameter to the preload trial.
Exercises with the perceptual learning experiment code
Attempt these problems.
- Run the code once and look at the
perceptuallearning_data.csvfile to make sure it makes sense to you. You can also compare the data saved in the server with the data dumped in the browser. Run the code again and see what happens to that file, and think about how you might get around that problem. - Check you can add a few more picture selection trials with other images and sound files (you might need to consult the
perceptual_learning_stims.csvfile to see the full list of stimuli). - There are 4 conditions in the experiment - all combinations of manipulated /d/ or manipulated /t/, same speaker or new speaker in the categorisation test. How would you build stimulus lists for these different conditions, i.e. what would you need to change in the code to change the condition a participant experienced? You don’t have to do anything fancy here - ideally we’d like to have the code assign participants to a random condition every time the experiment starts, and we’ll cover that soon, but at this point just figure out what bits of the stimulus list you need to manually edit to flip from one condition to another.
- How would you modify this code so that the phoneme categorisation trials are all repeated several times? Note that there is a manual way to do this and a fast way, using some built-in jsPsych functions for repeating things.
- At the moment the dean-teen buttons always appear in the same order. Can you randomise their left-right position and still keep track of which option the participant clicked?
- At the moment the audio we present using the
audio-button-responseplugin is interruptible - if you click part-way through the audio it will register your response and move to the next trial. Can you fix it to produce a non-interruptible audio, i.e. you can’t click until the audio is done? Hint: the trick here is going to look at the documentation) for theaudio-button-responseplugin. - Following the guidance in the notes above on preloading, add code to automatically preload the images used as buttons in the picture selection phase. The easy way to do this is to manually specify a list of images (including their path names!) to preload, generating this list automatically is a harder question below!
- [Harder, optional] The code doesn’t currently save the social network questionnaire data. Can you add a new function,
save_questionnaire_data, which runs at the end of the questionnaire trial and saves that data to a file on the server? You can just dump it into a file as an undigested string (i.e. with various curly brackets etc in there), or if you are feeling ambitious you can try to save some more nicely formatted data using the same tricks we use insave_perceptual_learning_data, in which case the first thing you are probably going to want to do is useconsole.logto get a look at the data generated by the questionnaire trial and take it from there. Once you have attempted this, you can look at my thoughts on how it could be done - this covers this question and the next. - [Harder, optional] Add code to automatically preload all the images used as buttons in the picture selection phase, without having to manually specify the image list. You could extract this automatically from
selection_stim_list, e.g. using a for-loop to work through the trials inselection_stim_list, extract the image names from thechoicesof each trial, and add them to a preload list. Once you have attempted this, you can look at my thoughts on how it could be done.
References
Re-use
All aspects of this work are licensed under a Creative Commons Attribution 4.0 International License.