Session 2 practical
Randomisation within and across trials, using trial data for contingent trials, filtering and saving data to the server
The plan for Thursday afternoon
We will look at code for a simple word learning / frequency learning experiment based on the Ferdinand et al. (2019) paper I will introduce briefly in my mini-lecture. This uses nested timelines and functions to construct trials which have a fairly complex structure. It also requires randomisation and contingent trials (what the participant sees on one trial depends on what they did at the previous trial), so we need to introduce some infrastructure to do that. Finally, I’ll add some code to filter experiment data and record the important data on the server at the end of the experiment, rather than just dumping it to the screen. As a result there is quite a lot in here! The first session tomorrow will be easier, so if we don’t get through all of today’s stuff we can use some time tomorrow to catch up.
Tutorial content
Before we get to the new experiment code, have a read through section 06 of the Online Experiments with jsPsych tutorial - you can stop when you get to the section titled “Sending the data line by line” since we’ll cover this tomorrow and we’ll be using a slightly different technique than Alisdair covers in his tutorial. It’s up to you whether you want to do the exercises dotted through the tutorial or not - they are not strictly necessary I think, since we will see the same bits of code in the word learning experiment, so I would recommend just reading rather than coding in the interests of time, but you can if you want. The key things you need to take away from the tutorial are:
- You can save data to the server either at the end of the experiment, which is what I have implemented in the word learning code, or after every trial (which we will get to later). Saving data trial-by-trial is better (e.g. if a participant contacts you to tell you they got part-way through the experiment then their computer died you can actually verify this, pay them accordingly and also have some of their data), but is slightly more complex and I am trying to introduce the complexity incrementally. You don’t have to understand the details of how the POST and PHP stuff works to save the data, just that it’s possible and it works.
- The
dataproperty of jsPsych trials. Each trial has adataparameter which is populated by the code automatically depending on what the participant does during the trial - e.g. on avideo-button-responsetrial it records the index of the button the participant pressed (0 for the first choice, 1 for the second choice, etc) indata.response. But we can also add to thedataparameter ourselves - we can add information about the participant to every trial (e.g. their ID number), or we can add specific bits of data to certain trials (in the tutorial Alisdair gives the example of marking up trial type to allow you to separate ‘boring’ trials from important ones). In the word learning experiment we’ll use the same technique to mark up important trials for later data filtering, but we’ll also use thedataproperty to record which label the participant clicked on (rather than just the button index, which is recorded automatically underdata.responseby button response trials), which we can then use to handle cases where the response at one trial affects what happens at the next trial.
A word learning experiment
Getting started
You need a bunch of files for this experiment - as usual an html file and a js file, but also a php file (for saving data) and a folder containing a bunch of images. Download the following zip file and then uncompress it into your usual jsPsych folder:
Again, the code makes some assumptions about the directory structure it’s going to live in - regardless of whether you are putting this on your own computer or on the tullo.co.uk server, these should sit in a folder called something like word_learning, alongside your grammaticality_judgments and self_paced_reading folders, and your word_learning folder needs to include a copy of the jspsych-6.3.1 code.
Assuming you have the directory structure all right, this code should run on your local computer (just open the word_learning.html file in your browser) or you can upload the whole word_learning folder to the public_html folder on the tullo.co.uk server and play with it there. Here’s what my public_html folder currently looks like on cyberduck.
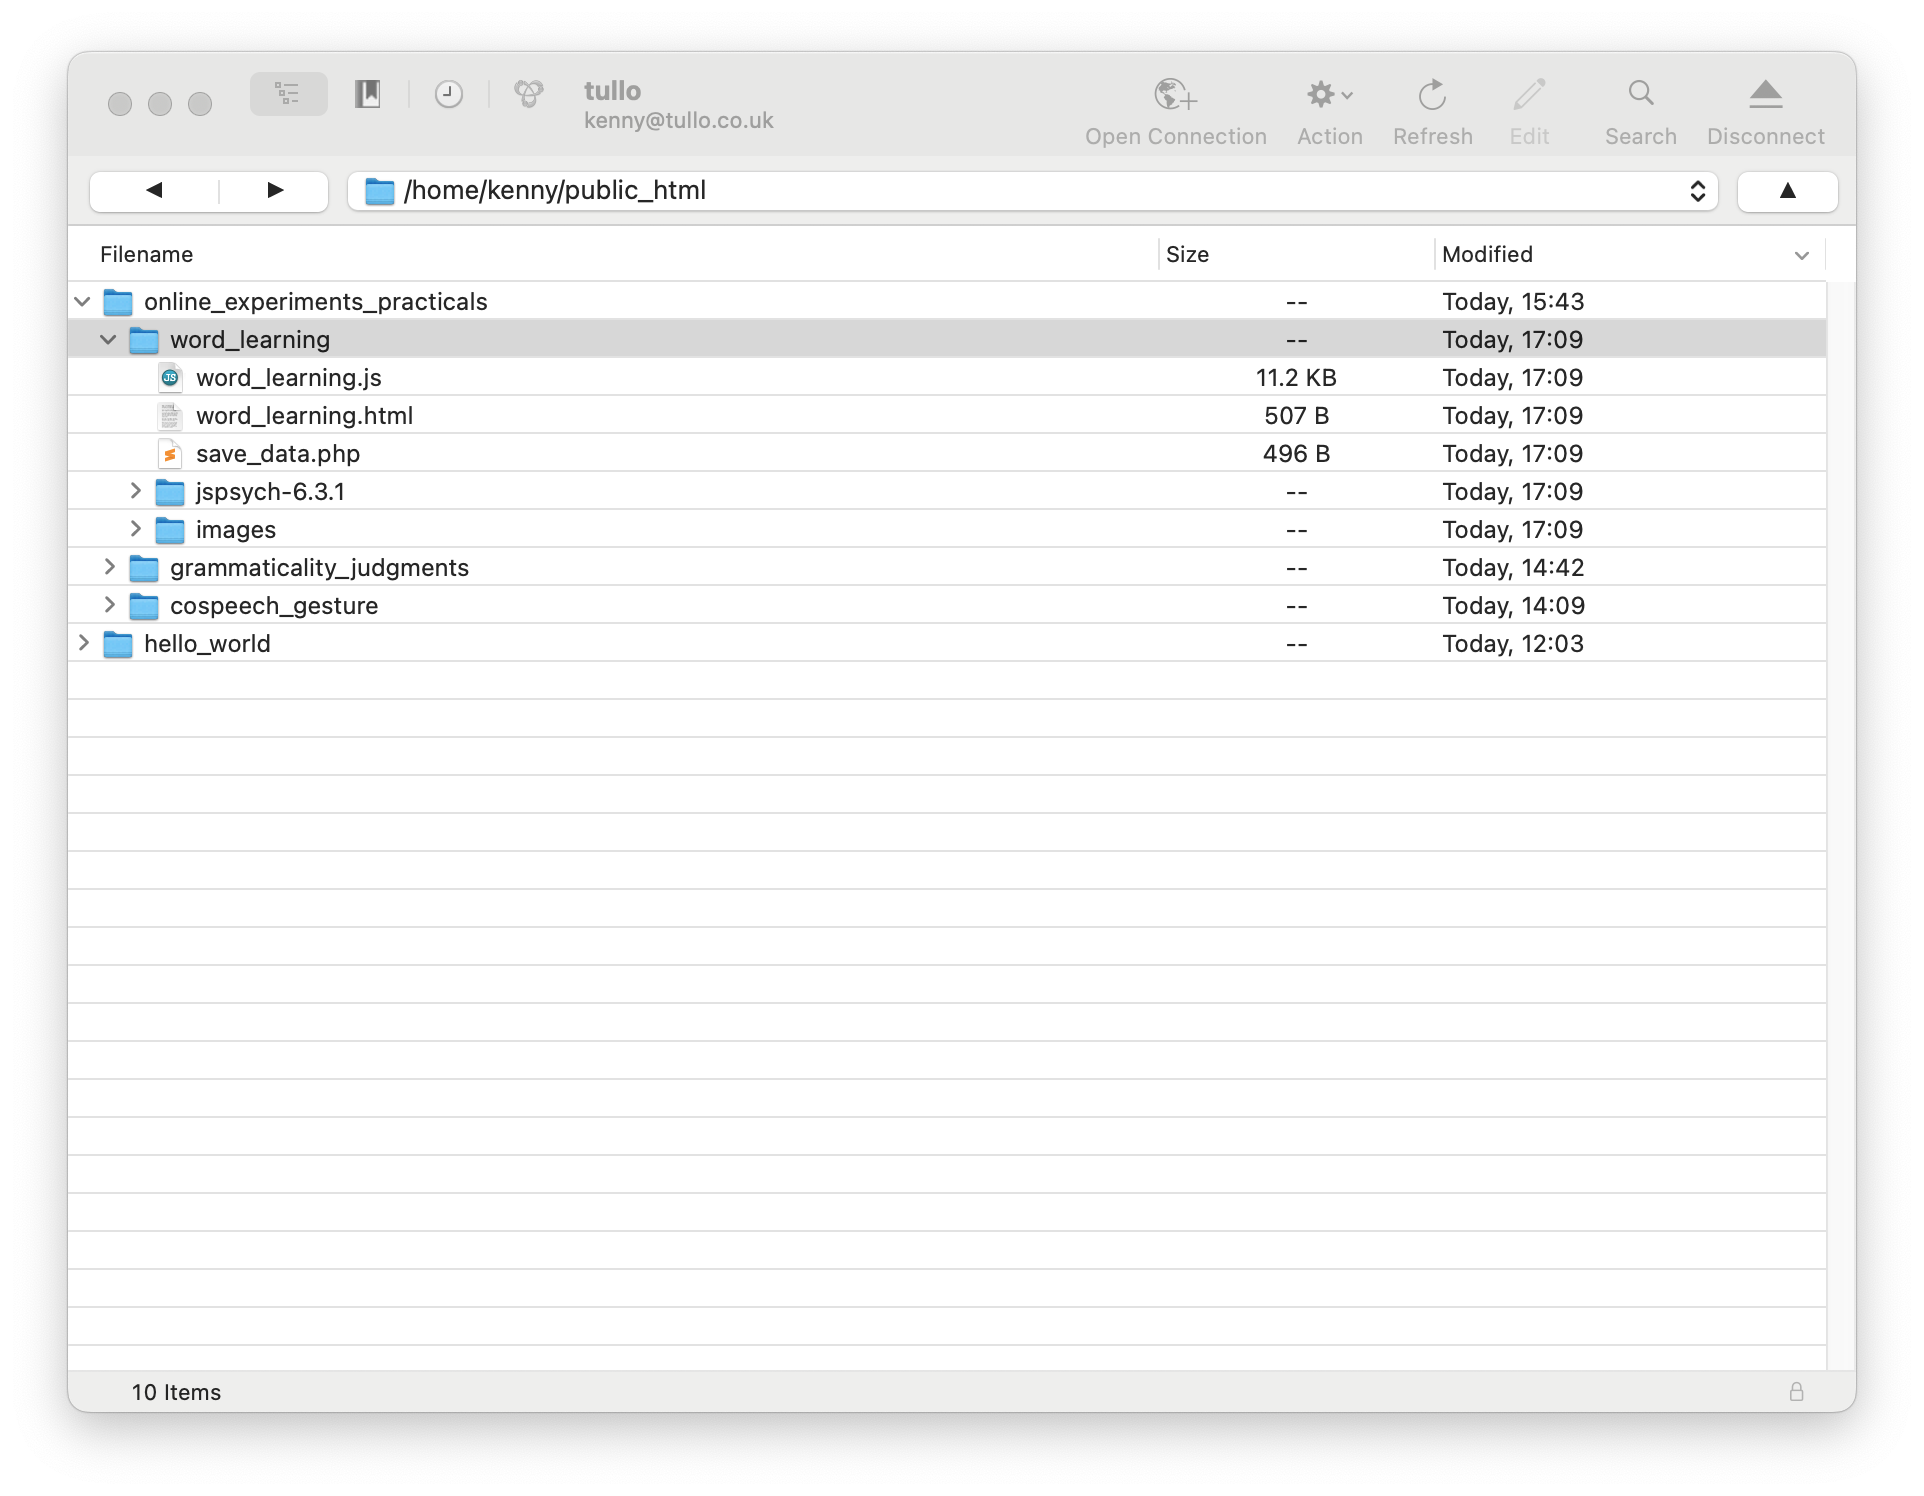
If your directory structure is the same as mine the url for your experiment will be https://tullo.co.uk/~USERNAME/online_experiments_practicals/word_learning/word_learning.html. Note that the code that saves the data to the server will only work if your code is actually running on the tullo.co.uk server - if you are running it on your own computer the data will not save anywhere, although it will still be shown on-screen. This is because your personal computer isn’t running anything that can handle POST commands and process them with PHP, which is what is involved in saving data - those things are all set up on the server for you.
First, get the code and run through it so you can check it runs, and you can see what it does. Then take a look at the HTML and js files in your code editor (e.g. Visual Studio Code).
Nested timelines and functions for building complex trials
Individual trials in this word-learning experiment are somewhat complex - they involve a couple of steps. There are also two trial types in the experiment - observation trials, which are presentations on an object plus a label (I think of these as training trials, so if I say “training” somewhere I mean “observation”, but I am trying to be consistent with the terminology we used in the paper), and production trials, where the participant is prompted to select a label for an object (I think of these as test trials).
Each observation trial consists of 2 steps: display the object for 1 second, then display the object plus a label for 2 seconds.
Each production trial consists of 2 steps: display the object plus two labels and have the participant select a label, then have the participant confirm their label choice with a further click (which serves to centre their cursor, to prevent them mashing through the experiment too fast by clicking continually on one side).
(NB. Ferdinand et al. have a 3rd stage at the end of each production trial where you then see the object plus the selected label for 2 further seconds - I have not included that in the code here, I don’t think it’s crucial and I couldn’t make it look nice in jsPsych without making everything else much more complicated!).
Complex multi-part trials can be very very laborious to code if you use the simple approach to timelines we have seen so far, so here I am going to use a couple of tricks for doing this more elegantly - nested timelines, and writing functions to create complex trials. I’ll walk you through the logic behind this below.
Trial data
You should by now be familiar with the idea that each jsPsych trial has some properties that we can set - the trial type (video with button response, html with keyboard response etc), the valid choices, maybe extra stuff like features of how a video will play or how the trial ends. In the same way, each trial has a data property. By default the data property is populated automatically by the plugin, and records data relevant to that trial type - for each plugin you’ll notice there’s a section of the documentation telling you what it records, for instance I can see from the image-button-response documentation (which is the plugin that we’ll be using in this experiment) that it records reaction time and the index of the button that the participant pressed. But we are also allowed to add stuff to the data property, to augment this automatically-generated content.
In this experiment we are going to use this data property in two ways. First, we are going to flag trials which actually contain important data. You will have already noticed that jsPsych gathers data on all trial types, including things like reaction times and stimulus on the consent screen. Recording everything is a good way to avoid losing anything, but it does make for quite a cluttered data structure at the end of the experiment. For certain critical trials in this experiment, we are going to add some information to the trial data, a block property, indicating trials that belong to the experiment phases/blocks that we really care about (what the participant saw on an observation trial, what they selected on a production trial); marking up those trials in that way will make it easy to find the important data at the end of the experiment, or later on when you are analysing your data.
Second, the data from one trial sticks around as the rest of the experiment runs. We can therefore look at the data property of earlier trials when constructing a new trial, which allows us to build sequences of trials where what the participant does at one trial (e.g. which button they clicked) affects what they see at the next trial: we look at the data from the earlier trial, extract the info we want, then use that to build the new trial.
Observation trials
OK, let’s get started with the code. Remember that each observation trial consists of 2 steps: display the object (an image) for 1 second, then display the object plus a label (some text) for 2 seconds. There are several ways you could do this in jsPsych, most obviously using the image-keyboard-response or image-button-response plugins - since we will need buttons later, I am going to use the image-button-response plugin.
The simplest way to do this would be to construct each sub-part of each observation trial as a stand-alone trial, and then stick them together into a simple flat timeline. For instance, if I want to show object4 (a shiny cylinder thing) paired with the label ‘buv’ then the label ‘cal’ I could do something like this:
var observation_trial_object4_only = {
  type: "image-button-response",
  stimulus: "images/object4.jpg",
  choices: [],
  trial_duration: 1000,
};
var observation_trial_object4_buv = {
  type: "image-button-response",
  stimulus: "images/object4.jpg",
  choices: [],
  prompt: "buv",
  trial_duration: 2000,
};
var observation_trial_object4_cal = {
  type: "image-button-response",
  stimulus: "images/object4.jpg",
  choices: [],
  prompt: "cal",
  trial_duration: 2000,
};

var simple_observation_timeline = [
  observation_object4_only,
  observation_object4_buv,
  observation_object4_only,
  observation_object4_cal,
];
Then if we run that simple_observation_timeline we will get the trial sequence we want.
A couple of things to note here.
- My
choicesare set to[](an empty array), which means the participant cannot provide a response (there are no buttons shown on screen) - that’s fine, since we just want them to watch and learn on these observation trials. - Because there are no
choicesthe participant can’t end the trial - we control thje trial duration with thetrial_durationparameter (which is in ms). - The
stimulusparameter points to a particular image file, in theimagesfolder, which you will see matches the directory structure I am using. Keeping your stimuli separate from your code keeps things nice and neat and is essential if you are building an experiment with hundreds or thousands of stimuli - you don’t want to be scrolling through all of those hunting for a single javascript file every time you need to edit your code. - I am using the
promptto show the label beneath the object. The Ferdinand paper shows the label above the object, but there is no built-in jsPsych plugin that does that, so rather than hacking about with the plugin code I am just showing the label underneath - editing the plugin to reposition the prompt is easy, but it surely doesn’t matter whether the prompt is above or below the image so we’ll stick with the default!
This approach would work OK, but it has a couple of drawbacks. Firstly, the fact that the observation_object4_only trial doesn’t have a prompt means that things will jump about a bit on the screen - the image will move up when the experiment reaches the trials with labels, to make space for the prompt, then drop down again when we are showing the object with no label, and all that movement is quite unpleasant to look at for the participant. This is actually easily fixed by including some dummy text as a prompt on the trials where we don’t want any text in the prompt - then every trial has a prompt, and so things don’t jump around on-screen so much. We could do that like this, using which is a special whitespace character in HTML that will give us a blank prompt:
var observation_trial_object4_only = {
  type: "image-button-response",
  stimulus: "images/object4.jpg",
  choices: [],
  prompt: " ", //dummy text
  trial_duration: 1000,
};
Note that just including prompt: " " doesn’t work, the code correctly identifies the fact that the prompt is empty, we have to include some content there.
The more important problem with this simple approach is that building this timeline is going to be very laborious and redundant for an experiment involving more than a few observation trials, and quite error prone (even just writing out this little example I forgot to change the prompt for the second trial from “buv” to “cal”, which might end up being an important mistake in a frequency-learning experiment). Worse, there is no easy way to randomise the trial list without hopelessly scrambling everything - if I just randomise this flat trial list there’s nothing to stop the object-only subtrials coming after the subtrials with the label, all the labels coming before all the observation parts, etc. Conceptually, our experiment consists of 2 trials each with 2 parts, and our flat timeline doesn’t capture that.
The solution to this is to use nested timelines to tie together the sub-parts of a single trial. Nested timelines are explained in the relevant part of the jsPsych documentation: we create a trial which has its own timeline, and then that timeline is expanded into a series of trials, one trial per item in the timeline (so each of these complex trials functions a bit like its own stand-alone embedded experiment with its own timeline). We can use nested timelines to form a more compressed representation of the long trial sequence above and get rid of some of the redundancy.
Using nested timelines means we can capture the code above as 2 trials (not 4), each with a nested timeline:
var observation_trial_object4_buv = {
  type: "image-button-response",
  stimulus: "images/object4.jpg",
  choices: [],
  timeline: [
    {
      prompt: " ", //dummy text
      trial_duration: 1000,
    },
    { prompt: "buv",
      trial_duration: 2000 },
  ],
};

var observation_trial_object4_cal = {
  type: "image-button-response",
  stimulus: "images/object4.jpg",
  choices: [],
  timeline: [
    {
      prompt: " ", //dummy text
      trial_duration: 1000,
    },
    { prompt: "cal",
      trial_duration: 2000 },
  ],
};

var simple_observation_timeline = [
  observation_object4_buv,
  observation_object4_cal,
];
Each trial has a nested timeline - the top level specifies the common properties shared by all trials in the nested timeline (type, stimulus, choices), then for each sub-trial in the nested timeline we specify the bits that vary (the first sub-trial for each word has a dummy prompt and a duration of 1000ms, the second has the label as the prompt and a longer duration).
That’s better, in that we could now randomise the order of our timeline without separating sub-trials from each other, but it still involves a lot of redundancy - everything about these two trials apart from the object image and the label is identical, but I still have to type out or copy-and-paste it all. Building a long list of trials like that is definitely do-able, but is probably quite error prone - to change the object image or word I have to jump into exactly the right spot in the nested timelines and change the right thing, and inevitably I will forget at some point or make a mistake. Plus it’s an entirely mechanical process - if you know the image and the label it’s obvious how to slot it into our trial template - and computers are good at doing mechanical stuff methodically, so it makes more sense to automate this.
What we’ll do is use a little bit of javascript and write a function which takes an object name and a label and slots that information into our trial template to build a trial, and returns that trial. The result is a function that builds a single observation trial for us in a neat, compartmentalised way. Here’s the code:
function make_observation_trial(object, label) {
  var object_filename = "images/" + object + ".jpg"; //build file name for the object
  trial = {
    type: "image-button-response",
    stimulus: object_filename,
    choices: [],
    timeline: [
      {
        prompt: " ", //dummy text
        trial_duration: 1000,
      },
      { prompt: label,
        trial_duration: 2000,
        data: { block: "observation" } },
    ],
  };
  return trial;
}
This bit of code creates a function, called make_observation_trial. We specify the object and the label (those are the arguments to the function) and it does the rest for us, returning a complex trial with a nested timeline containing the two sub-parts (object only, then object plus label).
A couple of things to note here:
- It would be annoying to have to specify the full path of the image files every time we use this function, so instead we just pass in the name of the object we want displayed (e.g.
'object4') and the code works out what the filename will be (it sticks the directory name on the front and the .jpg extension on the end). - As before, the trial this function creates has a nested timeline - the top level specifies the common properties shared by all trials (
type,stimulus,choices), then for each sub-trial in the nested timeline we specify the bits that vary (prompt,trial_duration). - For the second sub-trial I have also specified something for the
dataparameter - it saysdata:{block:'observation'}.{block:'observation'}is javascript notation for an object, which says basically “create a data structure with labelled entries; one of those entries is called block, and that entry contains the string ‘observation’”. This is the format that jsPsych expectsdataentries to be in, and jsPsych will later add to the starting data we have given it, recording the stimulus, trial duration etc alongside ourblockproperty. But now we have a way of spotting observation trials in the data at the end of the experiment - we just search for data items which have theblockproperty set to'observation'. This might seem a bit mysterious at the moment but it will hopefully be clearer later, particularly when you look at the data the experiment generates.
Now we can use this function to make some observation trials - in the code I make a 5-trial observation phase, where object4 is paired with two non-word labels, “buv” and “cal”. The first step is to make those two trial types with the two different labels, using our new function:
var observation_trial_object4_buv = make_observation_trial('object4','buv');
var observation_trial_object4_cal = make_observation_trial('object4','cal');
Now we are going to need several of these trials in training - let’s say I want 3 buvs and 2 cals. I could just do this manually, but it’s easier and less error-prone to use the built-in function that jsPsych provides for repeating trials, jsPsych.randomization.repeat.
var observation_trials = jsPsych.randomization.repeat(
  [observation_trial_object4_buv, observation_trial_object4_cal],
  [3, 2]
);
Note that we give jsPsych.randomization.repeat two arrays (enclosed in square brackets): a list of trials and then a list specifying how many repetitions we want of those trials (where the first trial in the trial list corresponds to the first number in the repeats list, the second trial corresponds to the second number, and so on). The documentation for that repeat function is here if you are curious.
And that’s our observation timeline built. Now we need to build the production trials.
Production trials
We will use some of the same tricks (a function that creates a trial with a nested timeline, adding a block property to the data so we can spot the production trials easily later), but also some new stuff to handle contingent trials.
Remember that each production trial consists of two steps: display the object plus two labels and have the participant select a label, then have the participant confirm their label choice with a further click in the middle. Step 1 is fairly straightforward, except that we want to copy Ferdinand et al. and randomise the left-right order in which the labels appear on each trial. But step 2 is tricky - the label shown at the 2nd step of the trial needs to depend on what button the participant clicks on the 1st step.
Rather than dumping the final code in here I am going to talk you through it in the same way as for the observation phase, starting out with imagining how you’d do a single production trial as a sequence of two separate trials, then going from that to a single trial with a nested timeline.
Here’s a simple way to implement the 1st step of a production trial - show the object plus two labelled buttons. Let’s say we want to show object4 with the options buv and cal, to follow on from our observation phase above.
var production_step1 = {
    type:'image-button-response',
    stimulus:'images/object4.jpg',
    choices:['buv','cal']
};
That is very simple, but the labels will always appear in the same order - buv on the left, cal on the right. That might be a problem - maybe people will be biased to click on one side, or maybe this will encourage them to always click on the same side and give very self-consistent responses just because they are being lazy. So we want to randomise the order of the buttons, and we want to do this independently for every trial, so that sometimes buv is on the left and sometimes it’s on the right.
There are a couple of ways you could do this in jsPsych. I am going to do it using the on_start property of trials. This allows us to specify some code to run when the trial starts but before anything is displayed on screen, and importantly the stuff that happens in on_start can alter the other trial properties. Specifically, initially we’ll start off with choices in a fixed order (it will complain if we try to leave choices unspecified, so we have to set it to something, it might as well be this, or we could do an empty array [] if you prefer) and then generate a random ordering of the labels in the on_start.
var production_step1 = {
  type: "image-button-response",
  stimulus: "images/object4.jpg",
  choices: ["buv", "cal"], //dummy choices initially
  on_start: function (trial) {
    var shuffled_label_choices = jsPsych.randomization.shuffle(["buv", "cal"]);
    trial.choices = shuffled_label_choices;
  },
};
Inside on_start we shuffle the two labels (using the another jspsych function, jsPsych.randomization.shuffle, which just shuffles an array - it will shuffle any array you give it, which is very handy) and then set the trial’s choices parameter to that shuffled ordering (by trial.choices = ...) - so by the time the participant actually sees the choices on the screen, on_start will already have done its work and the two buttons will appear in a randomised order.
That will work, but we still haven’t addressed the trickiest problem - how do we build the 2nd step of a production trial, where the label I select at step 1 is shown to me again for confirmation / to center my mouse? This is a pretty common thing to want to do - there are many experimental designs where you want to make behaviour at later trials depend on the participant’s response, for example you might want to provide corrective feedback, repeat trials that a participant gets wrong, or (as in our case) show something that relates to their earlier response.
The way to do this is to store the info you need from one trial in its data property, then later on you can use some built-in jsPsych functions to look back at the earlier trial and read the information you need from the relevant bit of that data. We already know that button response trials automatically record the index of the button the participant pressed, in data.response - that will be 0 if they pressed the first button, 1 if they pressed the second, etc. But that actually isn’t super-useful, because we are randomising the button positions - we don’t know if button 0 is buv or cal in our example, and (slightly weirdly in my opinion), jsPsych doesn’t automatically record the choices parameter to data. The solution to this is to add that information to the trial data ourselves, and then on the next trial we can dig it out and use it. At the start of the step 1 trial we’ll make a note of the order of the randomised labels (in on_start, straight after we randomise them). Then after the participant has made their selection (in on_finish), we’ll use our knowledge of the order the buttons appeared and the info on which button they pressed to work out which label they selected, and record that in data too. Then in step 2 we can just retrieve that information. So our step 1 trial would look like this:
var production_step1 = {
  type: "image-button-response",
  stimulus: "images/object4.jpg",
  choices: ["buv", "cal"], //dummy choices initially
  on_start: function (trial) {
    var shuffled_label_choices = jsPsych.randomization.shuffle(["buv", "cal"]);
    trial.choices = shuffled_label_choices;
    trial.data = { label_choices: shuffled_label_choices };
  },
  on_finish: function (data) {
    var button_number = data.response;
    data.label_selected = data.label_choices[button_number];
  },
};
The only thing that has changed about on_start is that we now add some info to the trial data - we create an entry called label_choices where we store the shuffled labels that are shown to the participant. Then we add an on_finish parameter, which looks up which button the participant pressed (data.response - the plugin records that automatically for us) and combines that with the data.label_choices info we saved to work out what label they selected (data.label_choices[button_number] will return the 0th label in label_choices if they clicked button 0, the 1st label if they clicked button 1, etc) and save that info in the trial data too, as data.label_selected.
Then the second step of the trial is fairly straightforward - when that trial starts (i.e. using on_start again) we can use a built-in jsPsych function to retrieve the data from the previous trial, then just read off the label_selected info we saved. That looks like this:
var production_step2 = {
  type: "image-button-response",
  stimulus: "images/object4.jpg",
  choices: [], //dummy choices initially
  on_start: function (trial) {
    var last_trial_data = jsPsych.data.get().last(1).values()[0];
    var last_trial_label = last_trial_data.label_selected;
    trial.choices = [last_trial_label];
  },
};
The only slightly intimidating part of that is the first line where we use jsPsych.data.get().last(1).values()[0] to access the last trial. jsPsych.data.get() is a jsPsych function that returns all the data from all trials so far, so we have to dig into it to get the last trial; that’s what last(1) does - if you wanted to get the last 5 trials you could do that with e.g. last(5). So that gives us the last trial, but that contains a lot of info we don’t need so we dig out what we want using the values() function (I have no idea what all the other stuff saved there is to be honest), then that gives us a list of which we take the first item (which is what the [0] does), and at last we have our data from the last trial. In case you are wondering how I figured all that out: I didn’t, it’s in the Dynamic parameters section of the jsPsych overview, I just copied it. Anyway, once we have our last trial data we just retrieve the info we want (which we saved under label_selected), then we set the choices for this trial to that label and we are done. Phew.
Or nearly done. Of course doing every production trial as a sequence of 2 trials would be a pain, for all the usual reasons, so instead what we are going to do is wrap those two component trials up in a function that creates a complex trial with a nested timeline. But all the logic and the details are the same - we give the function the image and the label choices, and it builds us a complex trial. That’s what is in the code below. I have made one tiny addition, which is to add some block information to the trial data for the crucial click-a-button part of this trial, just like I added block information to the observation trials above - this time I note that this is a production trial rather than an observation trial.
function make_production_trial(object, label_choices) {
  var object_filename = "images/" + object + ".jpg";
  var trial = {
    type: "image-button-response",
    stimulus: object_filename,
    timeline: [
      //subtrial 1: show the two labelled buttons and have the participant select
      {
        choices: label_choices, //these will be shuffled on_start
        //at the start of the trial, randomise the left-right order of the labels
        //and note that randomisation in data as label_choices
        on_start: function (trial) {
          var shuffled_label_choices =
            jsPsych.randomization.shuffle(label_choices);
          trial.choices = shuffled_label_choices;
          trial.data = {
            block: "production",
            label_choices: shuffled_label_choices,
          };
        },
        //at the end of the trial, use data.response to figure out
        //which label they selected, and add that to data
        on_finish: function (data) {
          var button_number = data.response;
          data.label_selected = data.label_choices[button_number];
        },
      },
      //subtrial 2: show the image plus selected label, make the participant click that label
      //(to re-center their mouse)
      {
        choices: [], //dummy choices to be over-written on_start
        on_start: function (trial) {
          //get the last trial response (the data generated by the button-click)
          var last_trial_data = jsPsych.data.get().last(1).values()[0];
          //look up the label_selected on that last trial
          var last_trial_label = last_trial_data.label_selected;
          trial.choices = [last_trial_label]; //this is your only choice
        },
      },
    ],
  };
  return trial;
};
That is a fairly scary-looking bit of code, but hopefully you understand how the two sub-trials fit together. If not, ask me!
At long last we can build our list of production trials using this function - I’ll take 5 trials, to test participants 5 times on the label for object 4. We can do that using jsPsych.randomization.repeat again, in a slightly different way - if the number of repeats required is a single number rather than an array of numbers, it repeats all the trials in the list that number of times. Since we only have one trial in the list this is not much of a difference, but it’s useful to know that there’s a shortcut built into jsPsych.randomization.repeat to repeat all trials in the list an equal number of times.
var production_trial_object4 = make_production_trial("object4", ["buv", "cal"]);
var production_trials = jsPsych.randomization.repeat(
  [production_trial_object4],
  5
);
Filtering and saving data
The next bit of the code is the usual stuff with placeholders for consent and instructions, so I’ll skip over that (NB. writing good experiment instructions is time-consuming and difficult, so I am making my life easier by just putting in placeholder text from now on!). The very final few lines of the code then build and run our timeline.
To build the timeline we need to stick our various trials and lists of trials together. You might think we could just do this like this:
var observation_trials_oopsie = [
  consent_screen,
  instruction_screen_observation,
  observation_trials,
  instruction_screen_production,
  production_trials,
  final_screen
];
But that is going to confuse jsPsych - it wants the experiment timeline to be an array of trials, and here we have actually given it an array consisting of some trials and some arrays of trials (observation_trials and production_trials are themselves arrays), so it doesn’t know what to do with it. Instead we have to use a built-in javascript function, concat, to concatenate (stick together) everything into a long flat array:
var full_timeline = [].concat(consent_screen,
                              instruction_screen_observation,
                              observation_trials,
                              instruction_screen_production,
                              production_trials,
                              final_screen)
What that essentially says is “take an empty array ([]) and then concatenate (add) to it these these various things”, which will produce what we want - a nice flat list of our 5 trials. This is a handy trick for building the kinds of flat trial lists that jsPsych wants, so you’ll see it again throughout the course.
Then we run the timeline. As usual, when we finish (so using the on_finish parameter of jsPsych.init) we are going to display the data on the screen. But we also want to save some of the trial data (the interesting trials - the crucial steps of the observation and test trials) to a csv file on the server. There are three new lines of code to do that.
jsPsych.init({
  timeline: full_timeline,
  on_finish: function () {
    //use data.get and filter to select the trials we want
    var relevant_data = jsPsych.data
      .get()
      .filter([{ block: "observation" }, { block: "production" }]);
    var relevant_data_as_csv = relevant_data.csv(); //convert that to a csv file
    save_data("wordlearning_data.csv", relevant_data_as_csv); //save it
    jsPsych.data.displayData("csv"); //and also dump *all* the data to screen
  },
});
jsPsych.data.get().filter([{block: 'observation'}, {block:'production'}]) uses a built-in jsPsych function, filter, to select the trials we want - specifically, that command says “give me only trial data for trials where the block property is equal to 'observation' or 'production'” (which is the two labels we added to allow us to pick out the observation and production trials). The filter function is documented in the jsPsych documentation on data manipulation in the section on “Aggregating and manipulating jsPsych data”. Then we turn that filtered data collection into a csv formatted-string (using another jsPsych function, csv()). Then finally we use the save_data function (copied directly from section 06 of Alisdair’s tutorial code, although I use a slightly different format for function names so I changed the name from saveData to save_data) to save that data to the server in a file called wordlearning_data.csv - if you run the code on the tullo.co.uk server you should see there is a file called wordlearning_data.csv in the folder called server_data, which is at quite a high level in your directory structure (you might have to jump up a few levels in the directory structure to find that folder). Note also that cyberduck doesn’t automatically refresh the list of files when a new file is added, so you may have to click the “Refresh” button to see your data file.
A quick word on filtering data and what data to save from an experiment. As Alisdair notes in his tutorial, anything you don’t save is lost and gone forever, so if in doubt it’s a good policy to save everything and then plan to filter out the irrelevant stuff during your analysis. Having said that, in this experiment the stuff we are filtering out is just the consent and information screens (which also generate data objects), so I’m not sure it’s worth saving that. But I would certainly never throw away any trial on which the participant generates a potentially meaningful response, just in case.
Exercises with the word learning experiment code
Attempt these problems.
- Run the code on the server once and look at the
wordlearning_data.csvfile to make sure it makes sense to you. You can also compare the data saved in the server with the data dumped in the browser - can you see how the filtering works, and which data format do you prefer? - Run the code several times and look at the
wordlearning_data.csvfile - you might have to refresh it on cyberduck to see the latest data. What happens to this data file every time you run the code? If you had multiple participants doing this experiment, what would you like to happen, and roughly how would you achieve that? - Figure out how to save the complete unfiltered data (not just the observation and production trials) to the server.
- The code here is for the low-load linguistic version of the Ferdinand et al. (2019) experiment, with 1 object. How would you modify the code to do something with higher load, e.g. 2 or 3 objects, each with 2 labels?
- Ferdinand et al. (2019) also have a non-linguistic version of the same experiment, where rather than words labelling objects participants observed coloured marbles being drawn from a bag (there were no fancy animations, it was just a picture of a marble above a picture of a bag), then produced some more marble draws themselves by clicking on buttons labelled with images of coloured marbles. You don’t have to implement it, but what sorts of changes would you need to make to the word learning code to implement this non-linguistic version? We’ll see some of these tools in next week’s practical.
- [Optional, hard] Can you figure out how to use the
jsPsych.randomization.shuffleNoRepeatsfunction documented here to do a version where observation and test trials for multiple objects are interspersed, but you never see the same object twice in a row? NB this will only work if you have 3+ different objects in the experiment - it’s too hard for the code to find randomisations with no repeats if you have a small number of objects, and impossible if you only have one object, so the code will hang while endlessly searching! If you decide to attempt this, have a go yourself and then you can look at my thoughts on how it could be done.
References
Re-use
All aspects of this work are licensed under a Creative Commons Attribution 4.0 International License.